
Lost Island Rising is the chapter where the campaign stops circling the bigger mystery and walks straight into it.
By this point, the game has already spent plenty of time hinting at Shandor, old cult activity, spiritual residue, and the sense that New York is drifting toward another large-scale disaster. Lost Island is where those threads stop feeling abstract.
Quick guide links
- Realistic / HD Campaign / Walkthrough for the full mission map on this branch.
- Realistic / HD Version Guide if you want the bigger branch overview.
- Level 7 transcript if you want the dialogue and cutscene order for this chapter.
- Tools of the Trade and Tips for Rookie Ghostbusters if a gadget gate, boss, or combat stretch is slowing you down.
- Previous chapter: Return to the Sedgewick
- Next chapter: Central Park Cemetery
Playable walkthrough
Lost Island Rising is one of those chapters that feels bigger and messier than it really is. The trick is to read it as a sequence of physical jobs: bridge the gap, survive the climb, open the hedge maze, get back inside the castle, then manage the black-slime machinery underground one room at a time.
Before you start
- Keep the Slime Tether and Slime Blower close at hand. This chapter keeps asking you to build a route or clean one.
- When the island throws a puzzle at you, stop for a second and look for the obvious moving part. It is usually a crane, crank, weight, drain, or orb rather than a hidden switch.
Step-by-step walkthrough
- Bridge the first gap with the dock crane. As soon as you land, tether the hanging crane arm and swing it across so it lies over the broken floor like a makeshift bridge. Cross it, then start up the long ramp toward the fortress.
- Climb the ramp from the sides, not the middle. A mine cart comes screaming downhill on the center line, so hug the left or right edge while you climb. At the top, clear the first Gargoyles before you rush the next bridge.
- Treat the outer approach like a cleanup crawl. Each short bridge section mixes Gargoyles, Venom Crawlers, and patches of black slime. Clear the slime before you sprint ahead, because the narrow platforms get ugly fast when Crawlers start swarming from both ends.
- Drop into the hedge maze when the top door slams shut. At the last bridge, the route forward deliberately closes in your face. Go down the stairs on the left and enter the maze instead of wasting time trying to force the sealed door.
- Burn a readable route through the hedges and find the working crank on the right side. You can blast or Boson-Dart the shrub walls to make the maze less annoying. Once you have room to see what you are doing, work toward the live crank, not the dead one in the far-left corner. Tether the crank to a solid object and turn it until the upper door unlocks.
- Clear the Black Slime Fiends before re-entering the building. Opening the maze exit also opens portals. Finish that fight first, then go back up the stairs and use the newly opened door into the castle.
- On the upper interior, circle the walkway and look for the boarded side passage. The castle briefly pretends the main door is your destination, but the more useful route is the boarded opening off the upper walk. Smash through it, grab your bearings, then return to the main line when the combat lock releases.
- After the separation, treat the catacombs like a guided descent. Keep moving through the open tunnel branches, but do check the side rooms when the game clearly gives you one. The correct route keeps feeding you forward with Crawlers, slime-slick floors, and narrow stone corridors until you reach the first big drainage room.
- Drain the first black-slime channel by dropping both weights. When you reach the room with the bridge, the gate, and the black river below, pull out the P.K.E. Meter if you need help spotting the mechanism. Tether each hanging weight down to the floor so the gate closes and the slime drains away. Do not linger once the room clears; the ambush comes immediately.
- Fight the Black Slime Monsters while backing into open ground. Switch to the Slime Blower and hit them from range. The safest rhythm is to stand near the ramp, spray while backpedaling, and sidestep the charge instead of trying to tank it head-on. Once the heavy monsters are gone, mop up the remaining Crawlers so you can read the floor again.
- Follow the lower tunnels to Winston, then rescue him before hunting for the next exit. The next stretch is more linear than it sounds. Push through the Crawler-heavy tunnels, take the obvious side turn when the route branches, and inspect the rocking iron maiden to free Winston.
- Push from Winston to Egon by controlling each arena first. In the larger lab rooms, clear the Black Slime Fiends and Ghosts before you rush the cages. If a portal or slime source is still spitting out problems, close that down before you move to the next rescue trigger.
- Use the three moving orbs to power the Orrery Chamber. Once you reach the lift and the upper chamber, tether each vertically moving orb and drag it down into place. That powers the mechanism and starts the last fight.
- Beat the Imprisoned Juvenile Slor by cycling eyes first, then the green node. Open with the hanging eyes in front of the creature. After they are gone, keep moving in a wide circle and bait the boss into exposing the glowing weak point on its head. Hit that point with the Slime Blower whenever it opens, reset your spacing, and repeat until the chamber clears.
What usually trips players up
- The island stops feeling unfair once you notice that every puzzle room is asking one simple question: what here moves, drains, or plugs the slime?
- The heavy Black Slime Monster fights go much better if you resist the urge to stand your ground in a choke point. Back into space and make them chase you.
The story gets stranger
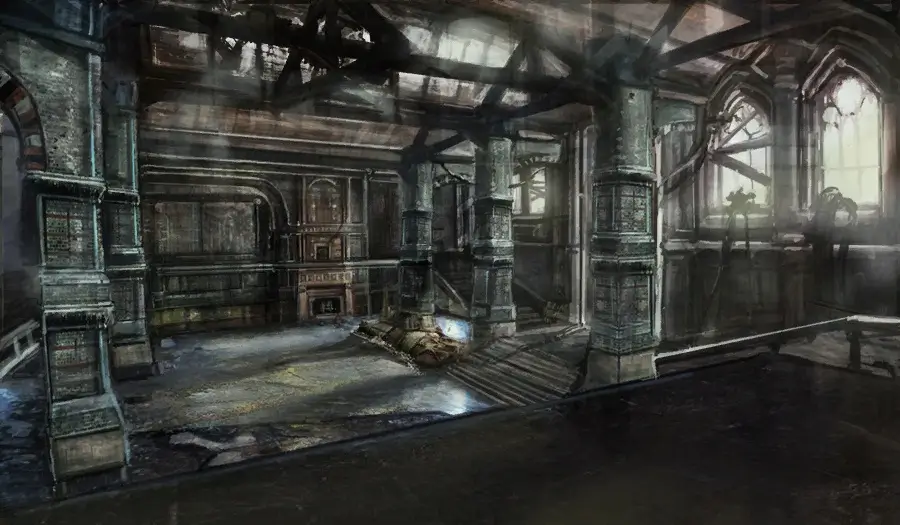
If the back half of the campaign kept operating only on city-block hauntings and familiar landmarks, the buildup would start to feel constrained. The story needs a place where the scale can widen and the weirder supernatural architecture can finally show itself.
Lost Island works so well because it gives the game a place where the escalation can become open, bizarre, and a little grandiose without breaking the Ghostbusters frame.
The Shandor material
Earlier chapters build Shandor as a presence. Lost Island lets that presence become a world. The game no longer has to gesture at hidden history from the edges of museums, libraries, and haunted Manhattan buildings. It can let the whole setting carry that story.
That makes the campaign feel like it is crossing a threshold. The team is not only cleaning up hauntings anymore. They are walking into the architecture of the problem itself.
What changes once Lost Island starts
- how boldly the chapter leaves ordinary New York behind
- how much the setting feels tied to Shandor’s larger spiritual machinery
- how the game lets the story get weirder without losing the Ghostbusters tone entirely
- how the chapter signals that the endgame is now close enough to touch
The threshold feeling
Some missions feel like chapters inside a campaign. Lost Island Rising feels like a threshold crossing. Once the team gets here, the game does not really get to pretend it is still dealing with an unusually rough week of ghost calls. The supernatural crisis has become too large and too old for that.
That is why the mission carries so much energy. It feels like the campaign walking through a door it cannot close again.
What people remember
People remember it because it is one of the places where the game feels most willing to commit to its own sequel mythology. That is not always easy for licensed material. Some games stay nervous about stepping too far outside the safest nostalgia beats.
Lost Island Rising does not. It trusts the campaign enough to get bigger, stranger, and more overtly supernatural.
The chapter’s payoff
Lost Island Rising lands because it turns all the earlier hints into a place the player can actually walk through. The chapter feels strange on purpose. It is supposed to. The game is no longer whispering about buried danger. It is standing inside it.
That is what makes the mission stick. It is the point where the campaign stops looking at the edge of the abyss and steps closer.
Be the first to comment