
Ghostbusters II on NES is messy in that very specific early-1990s way where every new scene seems determined to surprise you with a different control scheme, a different hazard, or a different reason to lose a life. Once you stop fighting that and start reading each scene on its own terms, the game becomes much more manageable.
This guide is here to do exactly that. It walks through the full game from the opening sewer run to Vigo, points out the sections that usually knock players around, and pulls together the practical advice that matters more than memorizing every tiny obstacle.
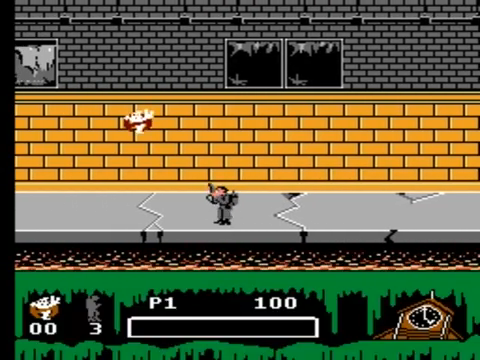
Quick rules that make the whole game easier
- You carry your lives from scene to scene, so every careless hit matters.
- Ghostbusters II logos are your extra-life path. Collect 20 and you earn another life.
- The game changes control rules between on-foot scenes, driving scenes, and the Statue of Liberty scenes.
- Speed is rarely the answer. Control is.
- If a section feels unfair, it usually means the game wants a calmer rhythm than your first instinct.
The full game structure at a glance
The game runs through eight scenes with three basic play styles:
- On-foot action scenes: sewer, courthouse, subway, museum, and the Vigo fight
- Driving scenes: the Tenements and Central Park
- Statue of Liberty scenes: the harbor and city march toward the museum
That variety is part of the game’s charm, but it is also why so many first runs feel disjointed. Treat each scene like its own little ruleset.
Scene 1: Van Horne sewer
The opening sewer scene teaches the game’s real attitude fast. You are being chased, enemies keep dropping in, and trying to out-muscle every threat usually gets you hit.
Your best habit here is to keep moving and create a steady wall of slime instead of fussing over perfect aim. The following spider-creature is basically your timer, so this scene rewards forward motion and punishes hesitation.
- Hold a reliable firing angle and keep shots flowing.
- Do not overreact to every bouncing enemy.
- Use traps on the low threats that cannot be handled cleanly by movement alone.
- Grab logos when they are on your line, but do not die for them.
Scene 2: Tenements driving stage
This is where a lot of players make the same mistake: they treat speed like success. It is not. The car stages are much easier when you value lane control, clean jumps, and survival over reckless acceleration.
- Stay calm and keep your car in a lane that gives you options.
- Shoot ghosts and floating globs whenever it is safe.
- Use purple arrows carefully so they help you clear gaps instead of throwing you into one.
- If things get ugly, control matters more than pace.
The powered-up shots and other medallion rewards help, but the bigger difference is still how cleanly you drive.
Scene 3: Courthouse
The courthouse brings you back on foot, so the adjustment is mental as much as mechanical. Slow back down. Watch enemy rhythms. Stop carrying driving-scene panic into a side-scrolling stage that wants steadier movement.
If the sewer taught you to keep pressure forward, the courthouse teaches you to respect spacing.
Scene 4: Central Park driving stage
The second driving scene builds on the first one and expects you to be smarter about jumps, ghost fire, and lane changes. The good news is that the same basic advice still works.
- Do not burn yourself out trying to drive aggressively all the time.
- Take easy logos and medallions when the route is clean.
- Use obstacles as timing problems, not panic buttons.
If the Tenements stage felt impossible at first, Central Park usually feels a lot better once the lane-control part finally clicks.
Scene 5: Subway
The subway scene is another pressure test for movement and composure. You are still trying to stay ahead of the scene while dealing with incoming hazards, which means rushed jumps and sloppy positioning tend to cost lives fast.
Play it like the sewer with a little more patience. Keep moving, but do not play wild.
Scenes 6 and 7: Statue of Liberty
The Statue of Liberty sections are one of the game’s big curveballs. Suddenly the game wants crowd control in a different form, and your best friend is the torch.
- Grab torches whenever you can so you can aim left and right.
- Use the book bomb when the screen gets crowded instead of hoarding it forever.
- Keep the air around Libby as clean as possible. Once ghosts swarm her, things spiral quickly.
These scenes look goofy, and honestly they are goofy, but they get much easier once you stop treating them like the sewer or car stages.
Scene 8: Vigo
The final battle is really four short passes, one for each Ghostbuster. The game is no longer asking whether you understand one scene. It is asking whether you learned how to stay under control across the whole run.
- Do not panic if one Ghostbuster falls. The structure gives you chances to recover.
- Value clean positioning over frantic button-mashing.
- Get comfortable reading what the fight is asking from the current Ghostbuster instead of forcing one rhythm onto all four passes.
Best survival habits in Ghostbusters II on NES
- Play for control, not bravado.
- Respect every scene change.
- Collect logos steadily so the extra lives start working for you.
- Use traps, power-ups, torches, and bombs like tools, not trophies.
- Do not let one rough scene scramble your tempo for the next one.
What usually gets players killed
- trying to go too fast in the driving scenes
- forgetting that lives carry through the whole game
- ignoring logos and then wondering where the extra lives went
- hoarding the book bomb too long in the Statue of Liberty scenes
- mashing through Vigo instead of reading the fight
Support pages for Ghostbusters II on NES
- Ghostbusters II (NES) Scene Guide and Stage Order – A quick breakdown of all eight scenes and what each one is really testing.
- Ghostbusters II (NES) Driving Stages Guide – The focused guide for the Tenements and Central Park car stages.
- Ghostbusters II (NES) Controls, Power-Ups, and Extra Lives – The practical reference page for scene controls, medallions, logos, torches, and survival tools.
- How to Beat Vigo in Ghostbusters II (NES) – The focused endgame page for the museum push and the final battle.
- Ghostbusters II (NES) Instruction Booklet – The typed-up manual if you want the original controls and scene descriptions beside the guide.
Be the first to comment